


Straighten Your Horizon
This is it. My first tutorial. Let's just hope that at least someone finds it useful. This is a dirt simple way to straighten your pictures in Photoshop. For whatever reason, 4 out of 5 times when I take an image on my DSLR, the horizon is off by a little bit at least, so I regularly need to fix it. I do that because I care. Oh, and FYI... I am working in CS4.

This is the original image... it looks cool, but the horizon is totally crooked. Who knows, maybe I was drinking when I took this picture? I don't know. Regardless, this will never do. People will NOT be impressed.
STEP 1
Select the Ruler Tool, which is available under the Eyedropper Tool flyout menu on the toolbar, or you can press Shift + I until you see the ruler in the upper left corner of the screen.

This tool's main function is to measure stuff (hard to believe, right?) but this is kind of a hidden purpose for it. I like to think of it as a "Tool Easter Egg" or something. Whatever.
STEP 2
Click and drag with the Ruler, across the horizon.

The length of your drag doesn't matter, but it's usually easier to tell if you have the right angle if it's longer. Once you let go, you'll see the line above. Wow, quite an accomplishment.
STEP 3
Under the Image menu, and then under Image Rotation, select the Arbitrary... option.
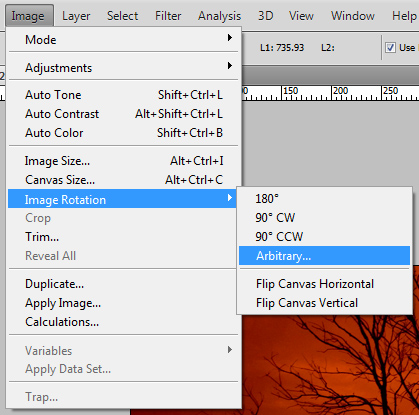
If you haven't used this option before, it basically allows you to rotate your canvas by inputting a degree of rotation. Bear in mind that this rotates your entire canvas, not just the selected layer.

The dialog is simple... but what the Ruler Tool has done is told this dialog exactly how much rotation it will require to make your measurement level. So all you have to do here is click OK.
STEP 4
Your canvas has rotated, but you'll see that things have gotten a little funky.
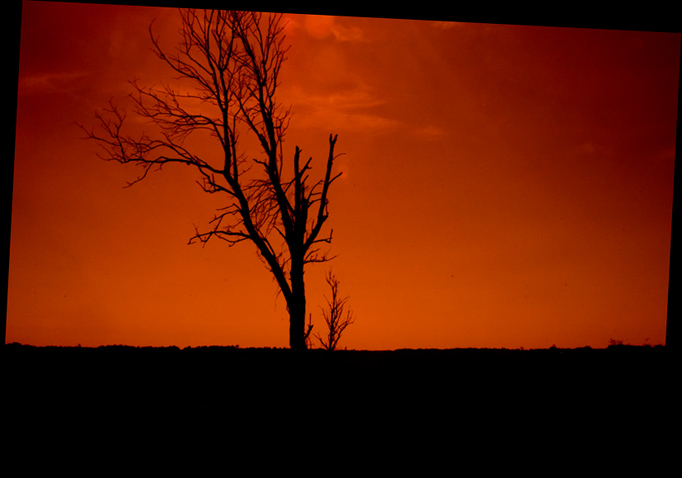
The horizon is straight (Yippee... at least that worked), but since your canvas has been rotated, there is some empty space around the edges of the picture. There are two good options here: Crop the image, or get creative with the Stamp Tool. Since this is a hi-res image, we can afford to crop it a little bit and save ourselves some time. Let's do that.
STEP 5
Let's get out our trusty Crop Tool (C). This one is a staple, so I won't go into it in too much depth (because there isn't much), but basically you're going to make your selection and eliminate all of the missing parts of the image.
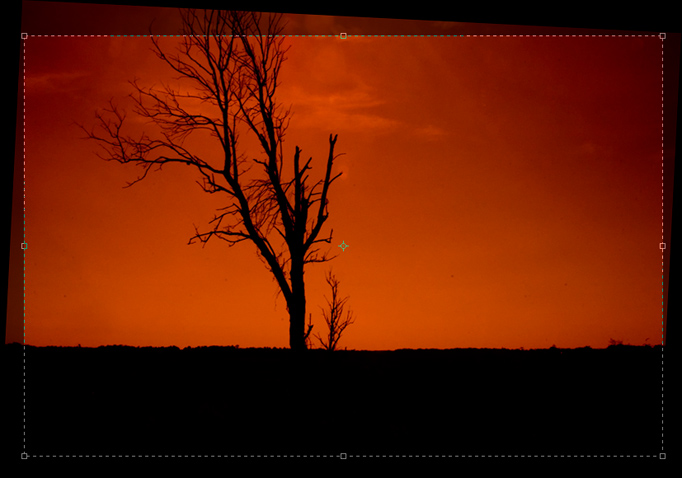
You can see above that you lose some of the image, but that's the price you pay. Once you're happy with your selection, just press Enter to confirm your crop selection. And hey, the good news is that if you don't like it, you can just Undo or Step Backwards (CTRL/CMD + ALT + Z). Sometimes I'll be doing something in real life and for a split second I think I can undo it. Reality is a bummer somtimes, right? Anyway...
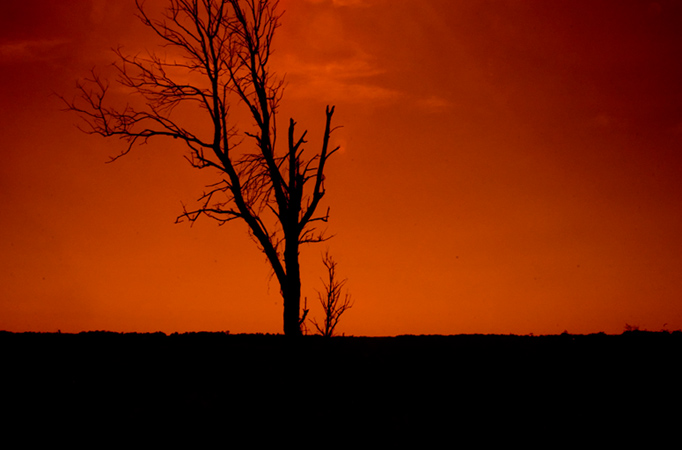
Lookie there... you're done! A nice, straightened image. A job well done. Print that, hang it above your toilet and move on. Now that you understand this basic technique, it'll be quick and easy to pull off whenever you need it.
 Photo Editing, Photoshop